On average, I have 4 -6 headshot photography sessions scheduled a week. Fortunately, this makes my work life incredibly busy, and gives me the opportunity to work with hundreds of people over the course of a year. From time to time, I get a client who will email me after delivering the final images, asking why I cropped the images the way I did, so I wanted to take this opportunity to explain my process publicly, so that future clients will have a better understanding of my process.
More often than not, I’m cutting off the top of your heads in my cropping. If you’re new to headshot photography, this is probably pretty shocking, and you’ll likely question why this was done. My explanation is simple – it’s science to make a better photograph.
There is a science with all visual media, and since the form is older than even written word, the science has found some incredible studies. While taking a photo allows me and my subjects to work in a freeform environment, there is still a lot of programmable factors that can go in to create an interesting photograph. One of my jobs as a headshot photographer is to make sure I get the most interesting and compelling image of you possible, so I’m always happy to take advantage of these sciences.
THE RULE OF THIRDS
One of the biggest tools I use when cropping and photographing subjects is to take advantage of the rule of thirds. This rule dates back to the 1700s, showing that when used correctly, you’re able to create focal points to an image that draws the viewer in. Using this technique is simple…
HOW TO USE THE RULE OF THIRDS
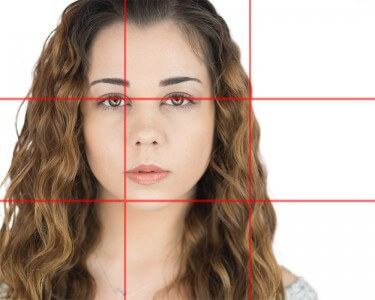
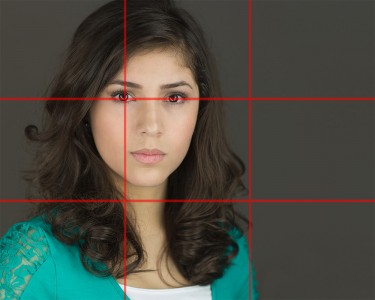
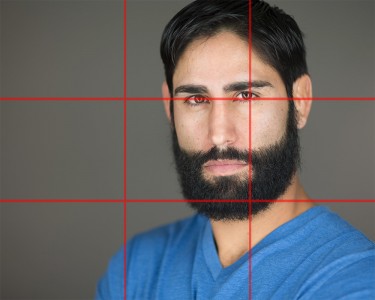
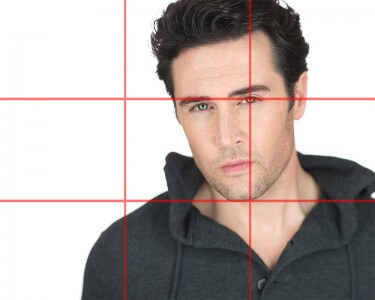
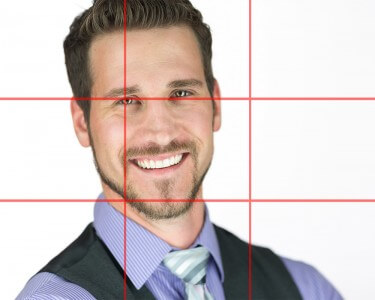
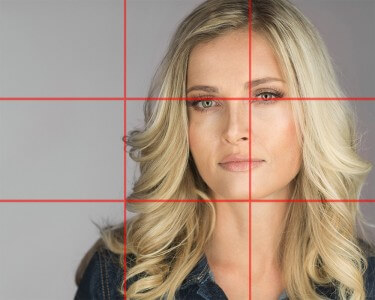
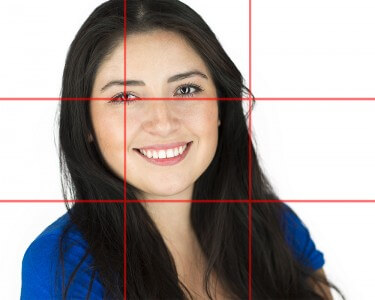
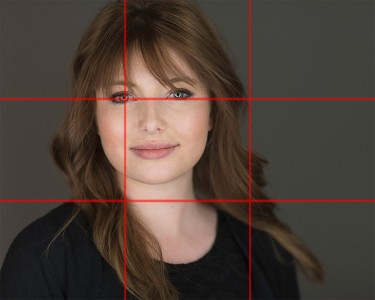
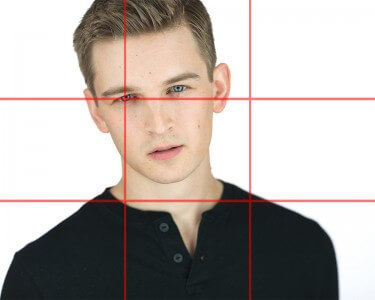
Using the rule of thirds is as simple as drawing vertical lines down the 1/3rd points of an image (One at 33%, and one at 66%), and then doing the same on the horizontal axis. The intersecting points of the lines are known as the best focal points for images. A common misconception is that the center point of an image is the most interesting point of a photo, but actually, our brains are trained to look at these rule of third focal points prior to the center of the frame.
I DRAW THE VIEWER IN BY MAKING THE FOCAL POINTS INTERESTING.
HOW I USE THE RULE OF THIRDS
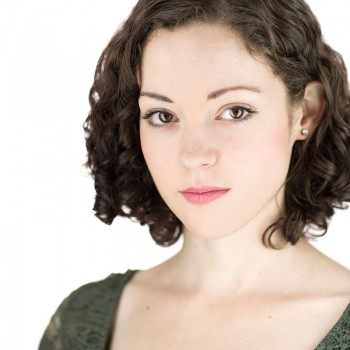
I look at this problem in a simple way. When you’re hiring me to take headshots, you’re hoping for a photo that looks for you, and is the most visually compelling image possible. Casting Directors are going through hundreds of headshots a day, so if you’re able to make yours stand out against the others, then you have a huge advantage. I make sure with each image, your eyes are the focal point of all images. Pairing that with how I naturally bring out the color and detail of the eye using lighting, I ensure your headshot is more interesting than the competitions.
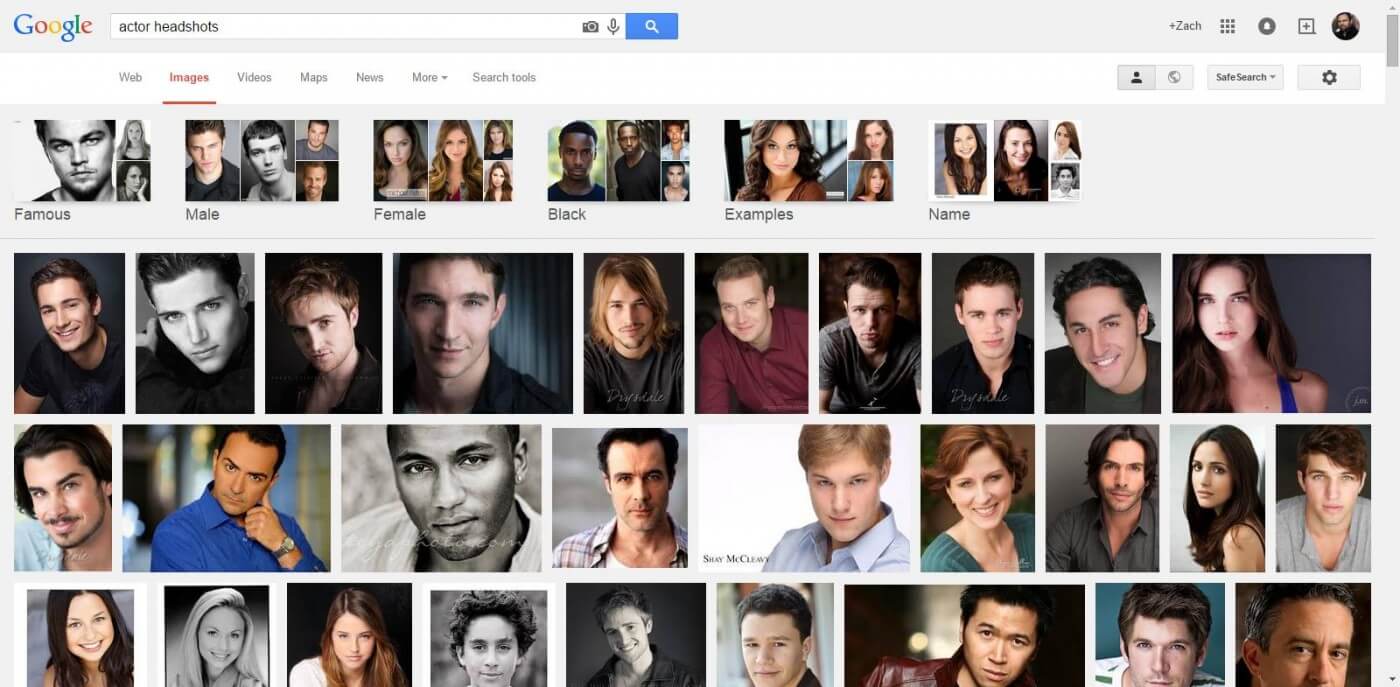
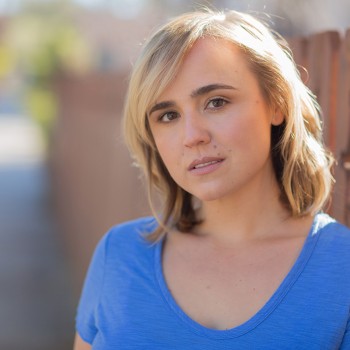
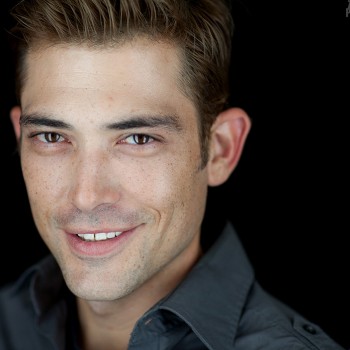
It’s also worth noting that I’m not the only photographer that uses this technique. In fact, if you Google Image Search Actor Headshots, you’ll find that most of them crop off the top of heads in order to achieve the focal points found within the rule of thirds. This technique in composition isn’t just found in headshot photography, but all forms of photography.
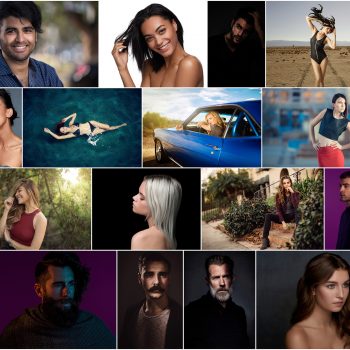
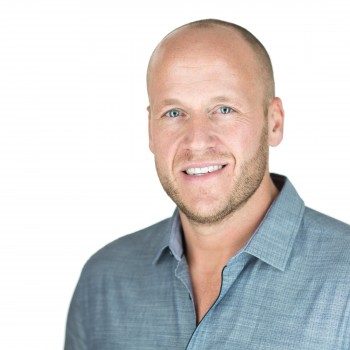
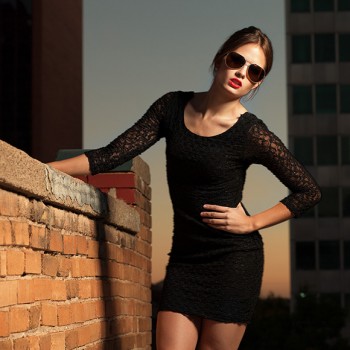
EXAMPLES OF MY HEADSHOT PHOTOGRAPHY USING THE RULE OF THIRDS
THE GOLDEN RATIO
Alongside the rule of thirds used to create better headshot photography, I also take advantage of the golden ratio. Classic thinkers such as Plato, Pythagoras and even Kepler believed that geometry is the secret to all things. Following this belief, among the most well known theories known as the Golden Ratio. Masters of art, such as Leonardo da Vinci, Salvador Dali and Picasso obsessed over proportions and the geometry of their work, and the all followed the same rule – The Golden Ratio.
WHAT IS THE GOLDEN RATIO
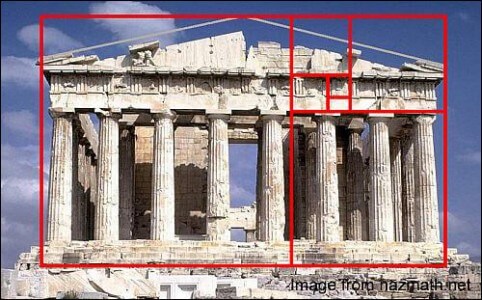
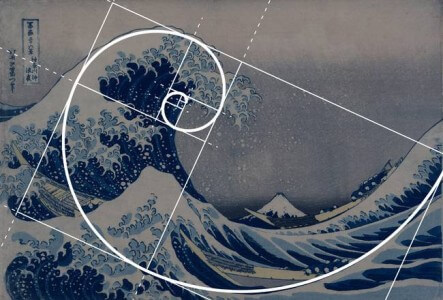
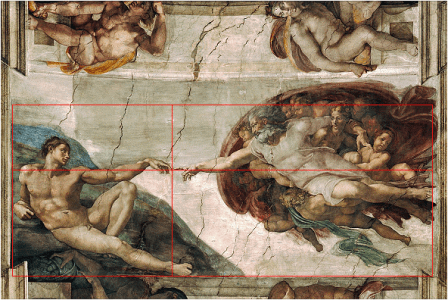
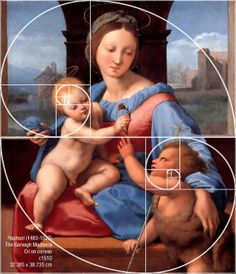
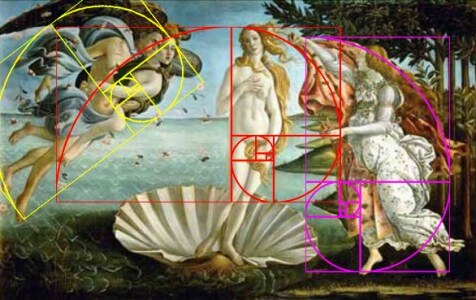
To put it mathematically, The Golden Ratio is the aesthetically pleasing proportions used to describe all art. The Golden Ratio is the largest shape of the art, divided by a square, where the resulting rectangle is the exact proportion of the original image, continued over and over again until a spiral is formed by the intersections.
This, when done correctly, makes the image more comforting to the human brain, resulting in more positive responses. Have you ever seen an image that made you feel uneasy, despite not having anything alarming within the frame? That was likely achieved by exploiting these techniques to add tension to the image.
Complicated I know, but the end result is create an interesting focal point within an image, a technique I use for all of my headshots to ensure you have the most visually compelling image available for your career.
Examples
So please keep this in mind next time you’re looking through art, or even my headshot photography. By using art history techniques that have been discovered over hundreds of years, I’m able to create better headshots for your business, and career as an actor. Following these guides, which may result in the crop cutting of the top of your head (trust me, that’s the least important part of your head anyway), but the end result is a much better photograph for you to use for your career.



4 Comments
…And here I was thinking you just never wanted to edit out my fly aways. 😉 Just kidding. Awesome article as always, Zach.
Maybe it’s both 😀
Love your shots.
Any video material? I’m based in UK so can’t make your training courses.
Cheers.
Sadly, I don’t at this time. But if anything changes, I’ll be sure to let you know!